Clown Whales and Painting Textures

clownwhale1

So if you have ever seen a Bowhead Whale, or maybe a photo of one, you may notice that this is not the usual coloration of a Bowhead, or indeed any whale.

Why the crazy colours, you may ask?

clownmap

It has to do with this. When you texture (colour) a 3D model, you are not actually painting the physical model, but an associated UV map- a flat skin that wraps around your model in a rather hannibal-esque manner. UV are dots that anchor particular points on a 3D model to particular spots on a texture map. Think of them like digital tacks, pinning texture-clothes to a naked model.clownwhale3
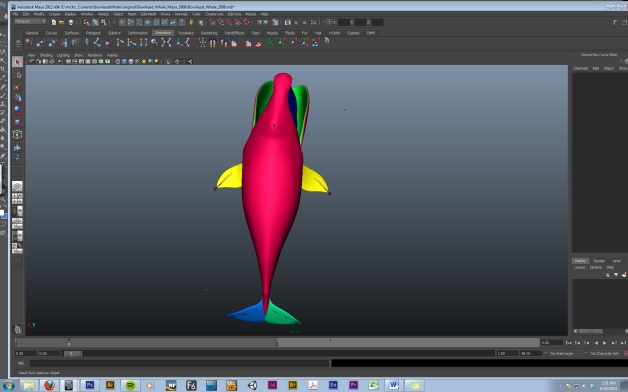
The Bowhead model that was acquired for this project (nick-named Ghostie) had a workable but rather low-res texture- in short, not up to snuff for our project. In an effort to discern which patches of grey texture went to what appendages, I painted each patch a different colour in Photoshop and then refreshed the texture map in Maya (one of our 3D animation software packages), giving us our clown whale.

clownwhale2

HDeye

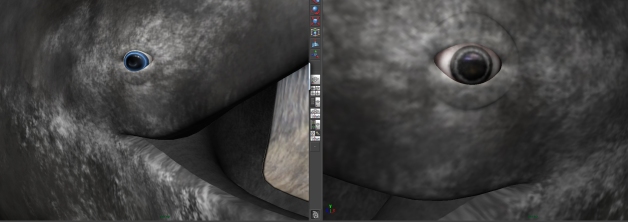
First to be replaced were Ghostie’s eyes.  On the right is the duller low-res texture, on the left is the more striking and accurate whale eyeball.  (Whales tend to have elliptical pupils, not circular, with ice blue irises.)

EYESEEYOU

The eyes purvey the living essence of your essentially dead, binary-coded computer model, so they have to be the most convincing part of the whole creature.

Otherwise it’s just a lively taxidermy model.

badbaleen2

Next to go were the Baleen sheets. Bowheads have shiny black baleen with sea-scum and other detritus built up in layers. (It’s hard to brush when you have flippers) After some debate, we agreed that the original baleen above appeared to belong to a sun-bleached, dead Bowhead whale.

HAYGUYS

After quite a few hours in Photoshop this is the result. I was really intimidated by the prospect of having to visually represent hundreds of baleen plates, but after identifying the striking aspects of Bowhead baleen (the steady repetition of grey and black lines offset with scummy browns and yellows) I put my hand to painting realistic-looking baleen.

goodbaleen2

I threw a basic lighting setup on him to see how his new choppers held up to rendering. (Maya tends to down-sample high resolution textures in its work window to keep the program running smoothly.)

HAYGUYS7

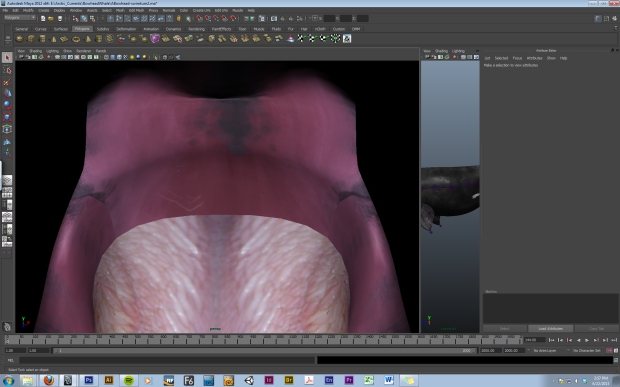
Next on the list were Ghostie’s tongue, and upper and lower palate. The tongue was pieced together from high resolution photo reference and colour-balanced accordingly. The palates were hand-painted using photos for texture and colour reference. Bowheads have a pickled-pink mouth with scummy grey patterns and white scars and scratches.

HAYGUYS4

The most rewarding thing about painting 3D model textures is seeing your 2D art seemingly magically project itself onto a fleshed-out model. I would work a few hours in photoshop, save the texture map, then hurriedly refresh the texture map on the whale model and smile at the results.

stitch11

Well, most of the time. One of the downsides of UV maps is that they have edges and stitches where different parts of your map come together. In the picture above, three different maps (tongue, top palate and bottom palate) are butting up against each other. This is made glaringly obvious because the colours and textures do not match one another at all.  However, if you refer to the colour map at the top of this post, the tongue (red shape), top palate (purple shape) and bottom palate (green shape) are three different patches and do not join at all.

This is because in Maya you can cookie-cutter out your texture patches and ignore the black spaces by arranging your UV’s accordingly.

stitch22 stitch33

Above are two more stitch edges- the top one is top palate vs. baleen plates, and the bottom shows where top palate becomes bottom palate.

stitch44

Here you can see a much happier stitch area. By arranging, stamping and overlapping the tongue texture, a much more subtle stitch area is achieved. I will be revisiting this gremlin later, but for now this is a happy whale mouth.

HAYGUYS2After two days of researching, painting and refreshing we have a brand new high definition whale mouth! Ghostie seems to be happy with his new textures.

HAYGUYS5

Next on the list is an overhaul of the body and fluke textures. Here he is with his low-res body to give you a better idea of the colour scheme.

HAYGUYS6

The body is definitely going to be the most challenging aspect to paint and texture- I need to research scarification patterns on whales as well as Bowhead fat rolls and markings. The trickiest part will be blending the fluke textures into the main body.

HAYGUYS3I‘ll leave you with a particularly terrifying render, which coincidentally gives a nice closeup of rendered baleen.

– Hannah Foss (Project Lead Animator)

Cracks in the Ice

IMG_8065The next entry was originally going to be titled “A Year Out” but that milestone came and went in a flurry of travel and parallel projects. The museum opened a new exhibit a couple weeks ago (Denali Legacy) and a couple weeks before that, I had the good fortune to be in Barrow for a few days to speak with scientists and whaling captains about bowhead whales and the sea-ice environment. I also hoped to capture some ambient audio, hear and see the odd whale, and check out the ice first hand to get a better sense of the cracks and leads, the ice ridges, and the water beneath it all.

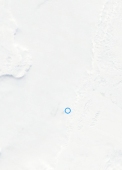
IMG_8036Unfortunately, the winds were not in our favor the week before I arrived, the week I was in Barrow, and even the week following. That’s not entirely true. When you fly into Barrow, you come across the water and on the monday (April 15th) we did so, there was a fantastic lead opening northwest of the point and clearly visible on the descent. The whaling crews were heading out. Everyone seemed to be excited that the season was finally starting. In the first satellite image below, you can make out the lead, north and west of the blue circle that is Barrow. The dates for the four images are April 15 through April 18, 2013.

visit__0004_119 visit__0003_120 visit__0002_121 visit__0001_122

The next day we went out on the ice via snow machine, mapping the trails of the whaling crews and hoping to get out to the ice edge when unexpectedly the whaling crews began coming back towards shore. The ice was coming back in. It may have been a mile wide at the start of the day, but by evening it had snapped shut. It essentially stayed that way for the next couple weeks.

Two days later we went back out on the ice, having no hope this time of getting to the ice edge and open water, but we did want to put a hydrophone down through a crack in the ice and listen for whales. Where two days beforehand one whaling captain had set his camp on the ice edge, it was now jumble ice where the two sheets had come back together.

lead

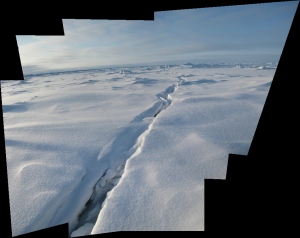
We found water there, but the slush was too thick and too deep to sink the hydrophone through to clear water. We fell back a half mile closer to shore where there was a significant crack in the sheet. Here we could get the hydrophone down into the water and have a listen to the ocean under the ice. We heard no whales, indicating that there were no whales for miles in all directions. Seems they might have understood the conditions weren’t quite right around Barrow and were either waiting or passing by farther out to sea.  We did hear bearded seals in the water. The whale scientists were not impressed, but the seals were pretty neat to hear.

IMG_8049                  hydrophonePano

One take home lesson from listening with the hydrophone is how much noise a person can make walking on the ice sheet. If any one of our party so much as took a light step, the noise propagated into the water prevented hearing anything else below.

Talking to scientists in Barrow and taking a look at years of photographs and video shot by scientists on the whale census and hunters waiting on the ice edge, I was able to bring back a large about of valuable information to our little animation project.

For a look at the ice conditions via satellite for today, check here.

crackPanoSm

Three Scales

PLANKTON: Shot 16.2.4

modis_weekly_2012_05_20modis_weekly_2012_06_17

Rachel Potter, physical oceanography research staff at the School of Fisheries and Ocean sciences has been working on on satellite maps of Chlorophyll-A productivity in parts of the Arctic for use in the film. Nutrients coming out of the Mackenzie RIver (lower center) fuel plankton production in the Arctic. This in turn feeds the copepods which feeds in turn, the whales. The maps shown here are weekly averages of the satellite images from different points in the summer of 2012. Black areas in these images refer to areas where there is land, sea ice, or clouds. A subsequent series of images will differentiate between these features.

KRILL: Shot 8.1.1

acShot08.1.1_side_0050

We’ve made progress on our krill rig and animation, tucking the feeding legs up and speeding up the swimming legs significantly. One of the continuing tasks for this May is to take this little guy, multiply him thousands and tens of thousands of times and then set them all swarming cohesively. That is, they need to move as a group while behaving like individuals, swimming close together and yet not colliding with one-another, seeking goals and avoiding obstacles – obstacles like a phalanx of feeding whales. We will have something to show for these tests in the weeks to come.

WHALES: Shot 18.1.4

whale_sim_01 whale_sim_02

We’ve completed the first round of whale – water-surface interaction tests resulting in a fully rendered sequence of images where a whale surfaces briefly and then dives again. As we’ve observed before, the resulting action is far too dynamic, but we have let it ride for testing purposes, verifying the computers do not mind the near 10 million particles (water droplets) generated as splashes and foam by the simulator. Five seconds of this shot goes through the computer-pipeline and renders faster than a single macro shot of the krill character above. More importantly, we now know the simulator and subsequent hardware and photorealistic renderer should be able handle everything else we intend to throw at them.

Next time on this blog: pictures and thoughts from our trip to Barrow, Alaska.

– Roger Topp (UAMN Head of Production)

Updates: New Models

Shot 6.2.2

copepod_02 copepod_04

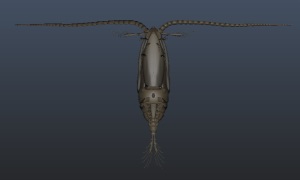
Hannah has built a new copepod model, and we have imported the static version into some scenes to test lighting and focus prior to calling it done and proceeding with the “character” rigging. All seems well and we’ll probably leave it be for now until we put together the rig and other shot elements. Plankton! You see, we make a film about whales and thus we animate whale food, and then it makes less but still significant sense to model whale food – food. We will probably leave it at that lest we start telling a history of the sun.

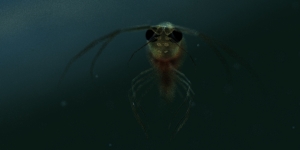
We will be showing the copepod singly, in small groups and also large, by the thousands swarms. Most of the details won’t be noticeable in the latter, but we hope to have a fair amount of fun with the multitude of legs and antennae while showing off the creature’s dramatically different styles of movement. They appear to move in two ways: while feeding, where they sort of pull themselves through the water, more with their antennae and feeding legs; and escaping, in which they use pretty much every appendage they have in order to propel themselves forward at a speed that, while over a very, very short distance, gives them status as the fastest animals on the planet.

Shot 18.1.6

whaleDiveData

Later in the film, we will be showing the behavior of one whale repeatedly diving to the bottom over the course of several hours. The data in the chart above shows the real life whale’s dives as recorded by researcher Mark Baumgartner. The data is recorded by a short duration “tag” that can be attached to the whale and then separates from the whale after several hours, providing the recorded data that can be retrieved by researchers. Data captured includes depth, temperature, salinity, and the amount of food available to the whale. The seafloor is not shown in the chart, but is evident as being tracked pretty closely by the whale’s dives. The chart itself will be animated with accompanying water temperature and ocean depth information.

For a scant few seconds of the film, we will show the tag attached to the diving whale. Enjoy the quick models shown below. In the film, they will not be seen so clearly, hence we have not bothered to model all the features of the tag. The tag configuration shown is of that attached to the whale and one of only two configurations required by the film. The second involves just the main barrel, as if floats to and then at the ocean surface. For those interested in scale, the main barrel is about 16.5 inches long.

whaleTag_01whaleTag_02

— Roger Topp (UAMN Head of Production)

In-Flight Adjustments

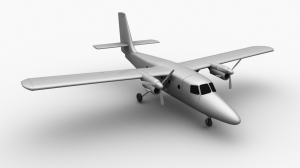
twinOtter_study_0006Time and money are perennial concerns, and accurate modeling of real world things requires both. The trick seems to be how to apply resources where they can be most effective, and for us that often means where these things are the most visible. How many seconds will a thing be on the screen? How close to the camera does it need to be, can it be, should it be? To be? Or not to be? If the camera is hanging outside an airplane, does the airplane need to exist?

One such potential THING for Arctic Currents will/might/should be a DeHavilland Twin Otter (DHC-6) as like those operated by NOAA. While the Twin Otter used for aerial bowhead survey work stays aloft for hours looking for whales, our 3D computer graphic thing is NEEDED on screen for about 6 seconds — maybe 10 seconds in the core narrative, the way we’re thinking at the moment, and can potentially return later in the film (in the way of themes and motifs and story fulfillment) for another 5-8 seconds. That’s not a lot of screen time for an thing as complicated as an airplane.

Some 3D models we make, some we buy, some we buy and wish we made and some we make and wish we had bought. All go through phases of repair, redesign, and rebuild. This one we bought. It’s far from perfect. On close inspection, there are obviously many parts missing, some of which we would have expected to be a part of any Twin Otter — and others that are obvious customizations to the NOAA aircraft and we wouldn’t expect so much from a stock model. The engine intakes appear to lack guts! Interestingly, they appear to be hollow, not a concern unless the camera wants to be put nose on to the plane. The wires from the tail, the odd sensor stem and the quality of the landing gear may or may not be an issue depending on how close we get to the aircraft. The position of the main gear IS an issue, but easily repaired. The number of windows – we will have to see. The poor quality of the landing gear fairings will require more of an effort. They hurt the eyes like looking at the sun.

twinOtter_study_0000ctwinOtter_study_0001c

We’ve gone as far now as to try and identify the differences between the features of our purchased model and those of the actual aircraft used for the aerial surveys. How many of these deficiencies we fix will depend on the shots in the film. Now to save time and money. We will set up the 3-4 shots that include the aircraft and from those images determine where changes to the models need to be made, all the while reminding ourselves that film is not real-life. We need to resist the urge to make our model a museum replica. This is hard. We are a museum. But our objective here is not to duplicate an object in every detail from every angle. We are not building a flight simulator, just what a few seconds of camera work needs. We need minor in-flight adjustments, not something that can actually get off the ground.

twinOtter_study_0003ctwinOtter_study_0004c

This is one of the interesting differences between producing an animated film as opposed to a live-action film. In live-action, the job of the filmmaker is largely subtractive. You need to remove the light you don’t want, the walls that are in the way, the ambient rumblings of unsettled ductwork and hungry gaffers. This is not a problem in animated film. The set starts with nothing, and the filmmaker’s job is entirely, absolutely, unyieldingly additive. If you want something, you have to make it. Everything has to be made, and you cannot afford to make things that not seen.

It is sad sometimes to look at the computer monitor and see no one is holding the camera (we have to fake camera shake), that for half the aircraft shots, there is no ocean, and when there is an ocean, there’s not necessarily an airplane, even if you think you can hear one. Because you want it so much to be real…

BUT, you will never see the sound-recordist’s boom mike at the top of a shot – unless we spend the time and money to put it there… we hope. Strange things do happen.

In the meantime we have a Twin Otter. It’s far from perfect. It will never be perfect. Our job will be to make sure no one can tell.

twinOtter_study_0005


– Roger Topp (UAMN Head of Production)

Silver Linings and the Design Process

Sometimes the difference between a disaster and a blessing is all in how you react. When faced with an unexpected outcome you can either fall prostrate and wailing in grief, or you can sit back and recooperate, and hit the problem from a refreshed perspective.

It’s like the saying goes: “Never model a tropical copepod when an arctic one will do.”

… You’ve never heard of it? Maybe it’s a regional thing.

copie5 2 copie2 2

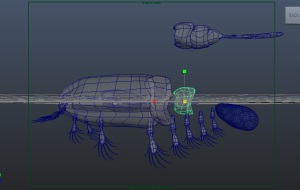
Let me explain. When an artist or technician embarks on the journey of creating a model, they usually refer to a folder or scrapbook of reference material. This collection of images helps define proportions, feature/detail variations, behaviour and the overarching concept of ‘copepod-ness’ that needs to be understood by the viewer.

Copepod

Unbeknownst to the production team, the rather varied and exciting photos of copepods we gathered included some tropical species. This became especially apparent when we presented a sculpted copepod model to one of our Marine Biologist consultants, Carin Ashjian. We found out I had modelled the wrong beastie.

RE-RESEARCH!

Luckily, Carin recommended some images of the correct arctic species of copepod; the vanilla, parka-wearing cousin of the original model.

together2-en_266733

Now that the copepod model parameters had been reset and I knew where I stood, I went on a demolition and salvage mission.

headWIP1

Step one: Analysis. The antennae were unsalvageable. Deleted and scheduled for remodel.

Head ‘horn’ protrusions deleted. Head resculpted to fit new dimensions.

Eye resized, organs resized.

bodyWIP2

Step two: Scale and move body sections on gross scale before getting onto individual features.

segmentWIP3

Step three: Separate the body segments (I had modelled them together originally) and resize/reposition/re-sculpt the vertices, edges, and faces.

bodyWIP5

Step four: Now the tricky part. With all the body segments in place, I needed to remodel the overlapping edges without them intersecting. This meant working systematically from largest segment to smallest segment, and tweaking all the edges and vertices until the segments looked natural and flush.

bodyrevWIP4

bodysegmentsWIP6 bodyrevWIP7

This screenshot was taken prior to re-sculpting the last segment into a more rounded, respectable copepod bottom.

Also, that floating blob is an egg sac. Well, was an egg sac. I deleted it.

bodygutsWIP8

Here you can see the close-to-finished model, with re-sculpted segments, resized legs and tail, and a new oil sac in his body cavity!

COPECOOLWIP9

Beautiful new antennae, one segment copied and resized. Rinse and repeat.

The edge vertices of this body-half were straightened into a line, then the body was mirrored to create a whole copepod!

wheecope10 wheee

Front view looking good.

INTERNALORGANSAGAIN INTERNALORGANS

Closer look at the internal organs and oil sac.

COPEPODWHEE

FINISHFORNOW

Polished and merged edge vertices, with some other minor size adjustments, ready for review!

Keep a cyclopean eye out for some rendered stills soon. I’m done with modelling for a while, and getting back into animating whales. Roger has given me a list of exciting shots to work on. Odds are you’ll get to see those soon too!

— Hannah Foss (Project Lead Animator)
Splish Splash, Taking A Deep Breath

bowhead_tex_0600Whales live in the water. It is hard to miss that fact, and animating whales moving through water is actually something of a comfort. Our animator does not have to worry about the creatures trying to balance believably on two or four or six legs, moving under the constant threat of gravity, having nothing to do with their hands, squinting under bright lights… Everything is more comfortable, in water. Buoyancy and typically slow moving, gliding, water creatures can make the production process go a lot easier.

Be kind to your animator. Set your film underwater.

But at some point, whales like all mammals need to breathe, and that’s when things get interesting. Building a realistic ocean surface is straightforward enough. However, at about two dozen places in the script, someone (the director) has been nice enough to indicate that we should have a whale come through that surface, whether gently to take a quick breath, breaking through sea ice, dramatically breaching, or cruising on their sides, mouths open in a chevron formation, hunting for krill just below the waves.

But why just break the water’s surface artificially, as if we’re cutting it with a knife, when we can seriously disturb it with mass displacement, splashes, mist, sea foam, and swirling currents, all driven by some genuine, serious fluid dynamics. This is what computers are for. We don’t have to remember the college math; we just have to wait for the computers to crank through the equations on their eighth, thirteenth, twenty-first attempt to get it right.

This week, we’ve been taking the first animation pass of Hannah’s whale and running it through a variety of fluid simulation processes to see what happens: what looks good, what seems easy enough to set-up, and what doesn’t take too many computers too long to process.

frame_00096frame_00119frame_00156

The shots shown here are part of a ten second sequence that took an i7 machine 17 hours to process first the core fluid and surface mesh, the some 1.2 million splash particles, and the some 1.3 million foam particles – what amounts to a low-resolution experiment. Once we’re sure this data doesn’t break the software down the pipeline (here’s hoping), we’ll do two things: 1. crank up the quality and resolution until we do break something (including but not stopping with our patience) and 2. tone down the splash!

frame_00097frame_00120frame_00145

The animation seemed benign enough at first, but by the end of the sequence, I’m not sure the whale has time to breathe with all that surface disturbance. I think the director’s note to our whale/actor/friend should be: “Relax. This is good, very promising, but let’s back up a little bit. Let’s take it down a notch. We’ll get to the drama soon enough. For now, just chill, come gently to this wonderfully excitable ocean surface and just take a deep breath.” We’ll move forward from there. Very promising.

– Roger Topp (UAMN Head of Production)

The Cycle of Creation

krill_04Shot 8.1.1:

Our whale heroes may be 15 meters large, but their prey can be as small as a grain of rice. This week, we took one of our previously built open underwater environments and made a host of changes, including swimming inch-long krill models with better textures, some new experiments with underwater “fog” and camera rack-focus and motion blur, and topped it off with a statistical spectrum wave simulation which gives results that are about as real as it gets for simulated sea surface wind-driven waves. Sounds cool and nerdy. Is cool and nerdy. We set three camera angles for three 5-second test shots for a lone krill amid small-scale current driven detritus, and put them in the render queue at half resolution for results we look forward to in a few days. We don’t expect anything close to final out of the renders, but we’ll get a better idea of where we’re on the right track with krill locomotion, camera techniques, and the environment.

…half a day later…

Work is moving pretty quickly. We have a few dozen frames rendered, but even before we post clips to our reviewers, we’ve suggestions regarding krill locomotion and posture coming back to us based on previous renders, and the cycle of creation continues.

acShot08.1.1_side_0046acShot08.1.1_side_0000

With the short depth of field, close-ups of the krill such as this can make it seem as if the animal is flying rather than swimming. Compare the camera focused on the krill with the camera focussed on the water surface from a frame earlier in the shot. The graininess of the krill character when out of focus is one of the reasons macro-scale shots take the computers far longer to render than human-scale shots. Elements out of focus need many rendering passes to clean up this grain. These test renders have these passes turned down to a draft quality level, but un-optimized, the process can still require up to half an hour for each frame to be  drawn.

Soon, we will be posting video clips: as they become available, as we find a format that fits the production pipeline efficiently, and as we determine they are not too embarrassing to show off. So, not a video clip yet, but lastly, here is a preview image of the sea surface object currently used in the krill shot above. You’re looking at a 15 meter patch of sea surface, with winds driving waves from the upper right to the lower left. Relatively calm seas. No chop. No white-caps this time. Stay tuned. Bowhead whales live in subarctic and arctic waters. There will be ICE!

acShot8.1.1_seaSurafacePreview

— Roger Topp (UAMN Head of Production)

All Things at Once

After spending a good part of the fall working and reworking the script for the bowheads film, we’re off and running this spring and launching into pretty much everything at once. The film will be released in about 14 months and the museum production staff will be very busy between this project and our other exhibits, films, and publications in the works. No doubt, we will go down to the wire.

As February 2012 comes to a close, Tamara Martz (UAMN Exhibits and Graphics Designer) has been working up the project logo, while Theresa Bakker (UAMN Media Coordinator) has been poring over the shooting scrip to find narrative weak spots and craft the film’s sound design, contacting likely vocal talent for both the English and Inupiat language versions of the film, and working with partners to acquire ambient and effects audio for the project. Hannah Foss (UAF Student and Project Lead Animator) has been modeling and rigging our primary animal characters – the whales, the krill, and the copepods – and has begun animation on the first character based shots that will go through the mill.

We have already spent an inordinate amount of time testing file types and effective pipelines as we run models and images and animations through the many different pieces of software required for the project. There will be surprises in store, but hopefully we’ve minimized them through the course of our recent pitched battle with supposedly universal file types. See Exhibit A, the plan for the production pipeline. No doubt things will change.

arcticCurrents_animFlowchart_02

Our initial shot list for the 20+ minute film includes some 140+ distinct shots. That number will only grow from here, but to start some place not at the beginning, we’ve chosen to first tackle several of the more technical shots in order to verify we can make the film we intend to.

Shot 18.1.4. We fired up the fluid dynamics simulation software and imported our initial whale and ice floe models to generate realistic water surfaces and splashes for shots where whales need to break, break ice, and make waves, wakes. and foam and affect the sea ice around them. Here’s one frame.

wakeFoam5

Everything shown is preliminary from the whale model to the character and quality of the sea surface (no character animation and no splashes yet), but we are glad to report the software is cooperating and the our next rendering will take everything up a notch.

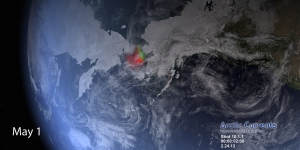
Shot 10.1.1. We worked with project lead scientist and the film’s producer Steve Okkonen to get krill trajectory simulation data into our animation software so we can watch the migration of the krill between April and December as they travel from the Bering Sea northward. The specific current data for the simulation is for 2002, but should meet the film’s needs as an overall current regime.

ac10.1.1_halfSize

The frame shown represents a view from about as far away from the Bering Sea as we are likely to want to get. These shots are capable of getting quite close as the image maps used to create the globe have a resolution of about 500m per pixel. Any closer than that and we will be using 250m per pixel daily satellite (MODIS) images of local areas, and then our sea surface simulations. Many things are missing from this shot, most notably the arctic sea ice. That data has been acquired and will be rendered in the next version.

Shot 20.1.3. At one point in the film we will focus on whale vocalizations and the use of hydrophones to record the sounds. Researcher Kate Stafford has provided the project with numerous audio recordings so we can focus both our ears and eyes. Shown is a spectrogram of one such 30 second recording. Time runs on the horizontal axis and audio frequency on the vertical axis.

spectrogram_B88041902.0312_30seconds_sm

We’ve started experimenting with ways we might dynamically present the spectrograms in the film, resulting in one idea below where we turn the sound waves into an evolving wave-landscape as the sound plays. Shown is a screen capture from our compositing software, which illustrates where we are also experimenting with the look of this and other shots.

comp_screenCap_20.3.1

That’s all for now. Happy the blog is created and we have a place to share our work in progress with our partners and everyone else interested in the project and UAMN’s production work. If you have questions, feel free to contact us at the UA Museum of the North, and check out our web and Facebook pages for other goings on at UAMN.

cheers

-Roger Topp (Project Director, UAMN Head of Production)